About Me

New Hartford, Connecticut, United States
Name: Todd Russo Location: New Hartford, CT, USA

Wednesday, November 30, 2011

Finishing the brake rebuild operation

Now that Thanksgiving is just a memory, we can finally settle down and do some more work on Old Biddy. The two projects which still lingered over my head were to get the calipers rebuilt and to work on fabricating the angle iron lift bar.
Since my workshop is finally cleaned and reorganized, John came over to help with the calipers. I felt like one of Santa’s elves working with him!

After we cleaned out the old rings and scraped the rest of the rust out, I was delegated the job of using the brake cleaner…lucky me! Notice that the mating surfaces were carefully polished.

John reinstalled new rubber rings and gently tapped in the metal locking ring with a 7 ounce hammer.

Then we squeezed the piston into the caliper with my vice, which is a two person job since my vice is not bolted to the bench. (Long story!)

In accordance with the “Book of Highly Exalted Words”, here is John torqueing the caliper back together.

Rebuilt at last! They will just have to be degreased before they get repainted their original black. The new pads, clips, shims, and pins will be installed after the calipers are in place on the car.

John brought the angle iron (an old bed frame rail) for me to fabricate the lifting bar. I will get to it on Friday.

At this point in time, it is crucial that I concentrate on getting the front sub-frame removed. All the planning and prep and forward progress that has been done up to this point rests solely upon this step. The front suspension, motor, steering rack, and radiator installation (etc…) will be very difficult to do with the sub-frame in place. Wish me luck!

Thanks for visiting.
Toddy

Saturday, November 19, 2011

Braking apart the calipers


This week was very busy but I did manage to squeeze in a couple free hours to do some work on Old Biddy. Since he has more tools than me, John figured that it would be easier to disassemble the front brake calipers at his house and to reassemble them here at home. So up to John’s I went with the brakes.
The bolts holding the halves together were stuck. Nothing that a vice and a little torque could not fix.

After taking out what was left of the brake pads, we thought that the pistons were going to be frozen in place.

I read somewhere about using compressed air (instead of brake fluid under pressure) to “pop” the pistons out. It worked GREAT!!

It was a relief to see that the pistons were in good reusable condition. They just have to be cleaned up before the rebuild operation takes place.

Here are all the parts that came out of the calipers. One of the main reasons the “car didn’t have good brakes” (as the guy who sold me the parts car stated to me.)

I also had a chance to swing by Chris’s to drop off the timing chain cover and the starter. The block has been mated to the transmission.

It looks like jewelry! Check out that nicely painted oil filter housing (if I do say so myself)!

Besides his pride in his craftsmanship and attention to details, one thing that I have always admired about Chris is his straight forward honesty. He has painstakingly labored over this motor more than we both thought that he would. But, he is not ready or in a hurry to finish it until it is finished correctly.
Thanks for visiting.
Toddy

Tuesday, November 15, 2011

Progress in slow motion

A lot of work was done this week but there is not much to show for it because it was more sanding, priming and painting. Time was a rare commodity but I did what I could when I could.
The brake calipers took a couple days to clean up and prime. They were a rusty mess!! I found out that they were originally black…thus black shall they be again.

As I was cleaning them, they literally crumbled apart.

I have now received all the necessary NOS and replacement parts to rebuild the calipers (as I cross my fingers and hope the pistons are still good.) Now I need to find the time to do it.

I finally got around to restoring the timing chain cover. I just need the time to take it down to Chris who is waiting for it.

I started to make a template out of a cracker box for some angle iron that will act as a lifting bracket. We will need that so we can lift the car body with an engine crane to remove the front sub-frame.

I hope to finish the bracket by the end of the week. The next two weeks are going to be crazy busy!!

Thanks for visiting.
Toddy

Saturday, November 5, 2011

Finding packets of joy.

As some of you may have heard, we had a humdinger of a Nor’easter snowstorm last Saturday night. We had no power for four and a half days and no internet (or cable connection) for nearly seven days. Not to mention the 21.5” of snow we received! So as can be expected the major restoration plans were put aside as we were in survival mode. But, the good news I have is worth passing along.
First, on Wednesday afternoon, the moment I arrived home and found out that we had our power restored, I discovered that my rear bumper from my secret parts source was delivered! The outside of it is very good and will probably only need a good cleaning and polishing.

The inside needs to have the car body sheet metal (that he smartly kept on in order to save the bumper) removed because the nuts and bolts are rusted. It will receive the same wire wheel and chrome paint treatment as the front bumper.

And, somehow John found my brake calipers in a box in his garage! They will be restored and rebuilt. I just have to find out the correct color for them, which will be either red, brass or yellow…I cannot tell until I start to clean them up.

They happen to be the same calipers used on 1963-1979 MG Midgets. The only difference is that the center groove is wider on the Midgets because the rotor is wider.

This is my example of “you never really know what you are going to get when you buy things on eBay sometimes”. This pad set was one of two that I bought from a fellow in Ontario Canada a couple years ago. First he listed them as an auction for one front brake caliper kit/box for an MG 1100. He had two sets available so I bought both sets from him in a relatively inexpensive ”Buy It Now”. When I received them I noticed that each box had a set for a pair of front disc brake calipers. Not only that, but they are definitely NOT for an MG 1100 nor any ADO16 car! So knowing that the calipers are the same as a Midget, I had to order a new set of pads, clips, and shims from Moss Motors today. Now I have to find out what cars these fit and put both sets back up on eBay and be accurate (and honest) in their description!

I hope we can finally get to the sub-frame removal this week.
Thanks for visiting.
Toddy

Saturday, October 29, 2011

Front suspension prep

The final step to do before removing and then rebuilding the front sub-frame on Old Biddy was to collect all the restored front suspension parts together so I could organize them to see what needed to be done.

The final remaining task was to install new roller joint kits in the upper support (or radius) arms. But there were no instructions anywhere on how to do it. I even consulted the “Book of Highly Exalted Words” which explains “for reassembly reverse the process for disassembly.” Um……OK then.

When John took a look at them and could not figure out how to do it either, I decided to take them down to Chris, who loves to work on Minis. He scratched his head for a minute and then started to figure out how they went together as he assembled them.

Yeay! And after three years of waiting, another pesky task was marked off the list! (Note: the 1100 roller joint kits are unique. Many people think they are assembled like a Mini or 1800 “Land crab”, but they are quite different.)

And of course, Chris sent me home with more homework…to refurbish the timing chain cover.

Since it is Halloween, I thought I would give you some eye candy as a treat to enjoy. The machined and painted block will be reassembled this week.

The completed transmission and differential patiently wait on the bench to get attached to the block.

This week’s focus at home will be to rebuild the front sub-frame and to prepare it for the motor.

Thanks for visiting.
Toddy

Sunday, October 23, 2011

The pedal box assembly project

The pedal box assembly was placed up on my bench to sort out the parts, and to remind myself what needed to be done to complete it. When I pulled the assembly out of the old car four years ago it was a rusty hulk. For instance, the brake pedal was rusted and frozen to the pivot shaft and did not even move! Since then, I spent many hours cleaning up the parts to get it to this point. To reassemble it now, four tasks had to be done. Both the clutch and brake master cylinders needed to be refurbished, the brake pedal needed new bronze sleeves put in and then it had to be painted, and the pivot bolt needed to be rethreaded.

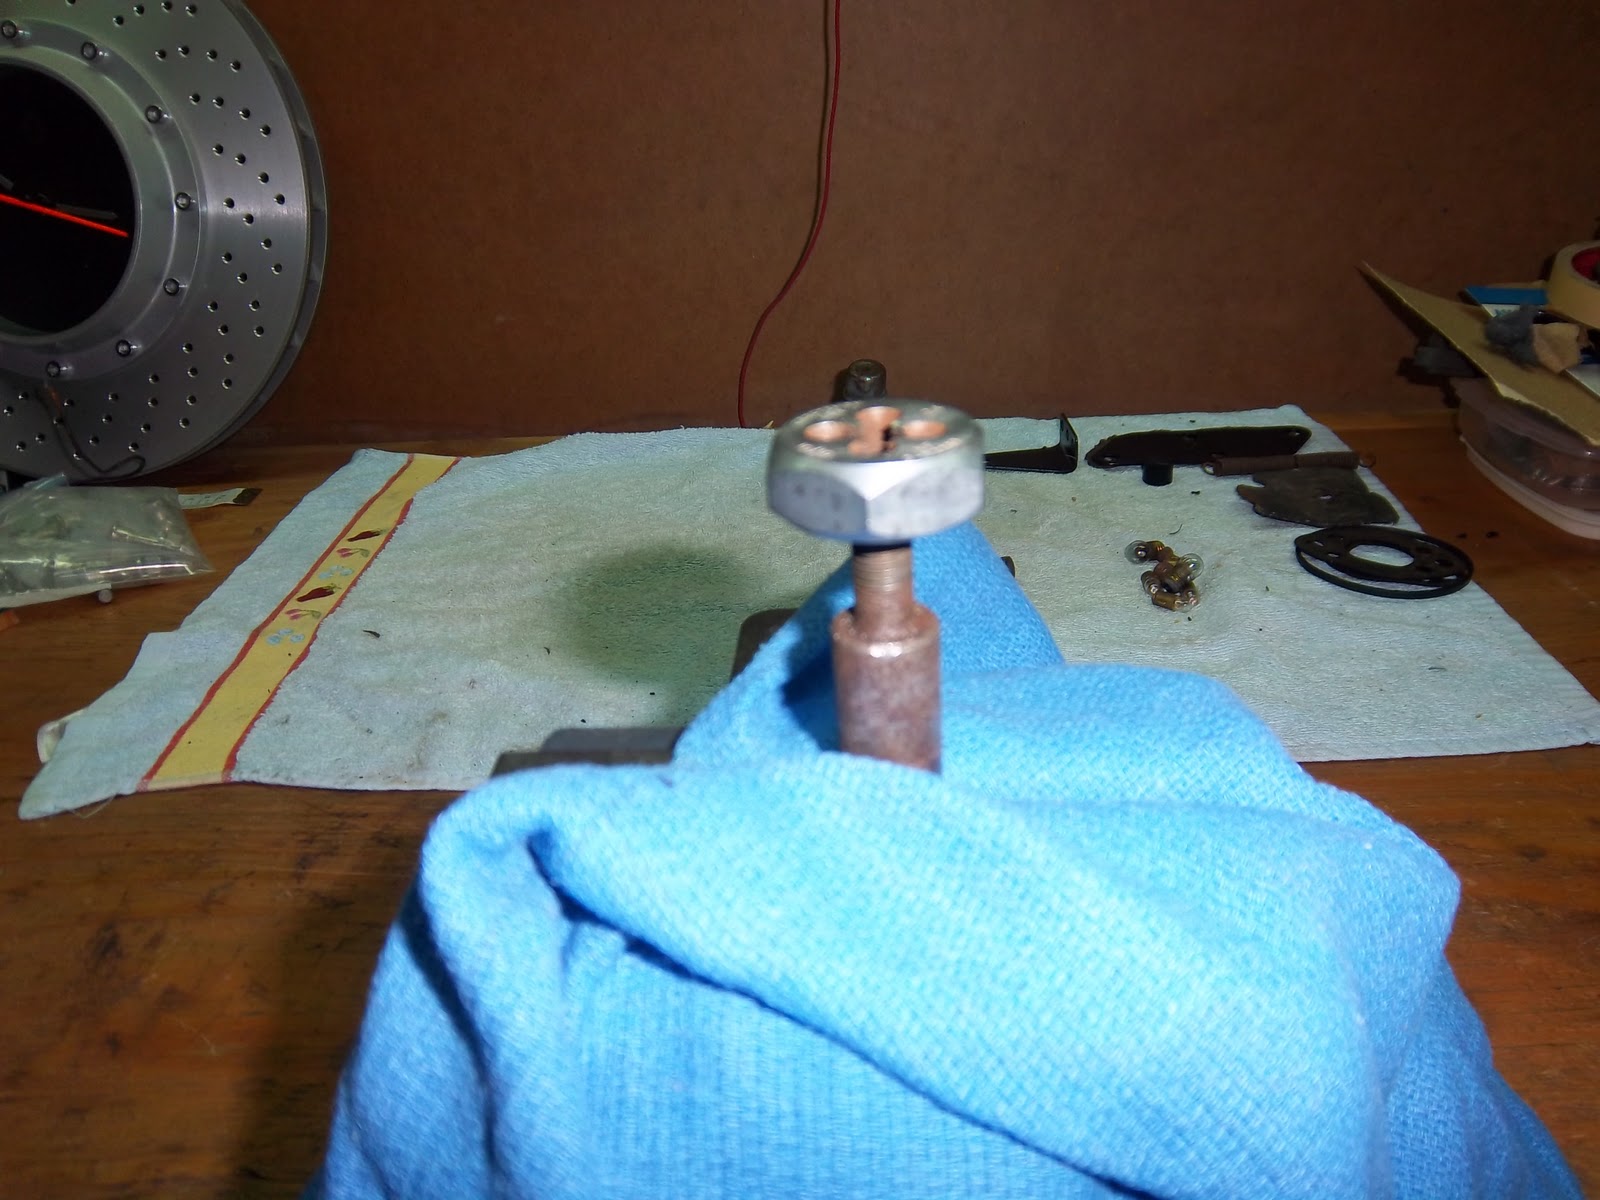
In order to get the frozen pivot shaft out I had to tap (err, I mean “beat”) on the threaded end, which then buggered it up. It was placed in my vice and a 5/16” x 24 die was twisted on.

For the first time in my life I got it right and did not cross thread it on the first try!!

Next up was to refurbish the master cylinder. Here is the before shot with the new (Lockheed SSB 703) kit.

And…the after picture with the old worn out kit and all polished with “0000” steel wool and Nevr Dull.

Then it was on to the clutch master cylinder with new (Lockheed SSB 716) kit. Before.

During…better known as the “guts shot”.

And the after. I am not going for a perfect Concours look to the car. I actually like a little patina on the bare metal parts.

This past Thursday evening we had our monthly Litchfield County group gathering of the Connecticut MG Club. I brought the brake pedal to the pizza restaurant to ask for advice on how to change out the bushings. My friend and neighbor Silas Kinsey offered to take it home to swap out the little bronze tubes because he had a press. “It’ll take me five minutes to do”, he said. I did not hear from him after that. Then, on my doorstep Saturday morning I found the re-bushed brake pedal that Si dropped off. Thank you, Si!!

So after I painted it up and let it cure overnight, the pedal box assembly was reassembled as it was installed in the car!!

After I get the 5/16” x 24 nuts and washers for the cylinders, it will be time to celebrate another victory!!

Thanks for visiting.
Toddy

Sunday, October 16, 2011

A Brazin' we will go!

This week I had a chance to go with John to visit our friend, Daryl, in his Tech Ed shop at an area high school. I could have used the shop in the high school where I (substitute) teach but instead I enjoy the camaraderie. I took three projects along with me to complete.
One end of the holding strap for the windshield washer fluid bottle holder popped off and needed a quick repair.

Four years ago I tried to remove the bolts to the brackets that hold a brake caliper to the brake dust shield. I busted all three off! I was young and dumb back then...what can I say?


The sub-frame motor mount on the passenger side of the Austin America sub-frame (which is the one I am using because it is in the car now) is 3/8” narrower than the (motor’s) original 1100 engine sub-frame (pictured below.) In order for the motor to fit properly in the Austin America sub-frame, I had to make a pattern then fabricate a spacer out of a spare 3/8” aluminum sheet that John had.

When we got to the shop, I first cut the spacer out on a very dull band saw. Once the sub-frame is taken out of the car (to install the motor and front suspension), I will have to measure for and then drill the holes in the spacer before we install the motor.

John used the torch to loosen the bolts. He reinstalled the nuts onto the dust covers and brazed them in place instead of spot welding. He likes to braze things.

Next, we took the bottle washer holder and measured the bottle for fit. He clamped the holder into place so he could braze that, too, instead of spot welding it together. Did I mention that John likes to braze things?

It only took us an hour and a half to complete all three projects. I just do not have the tools (nor the skills) to do those repairs at home. I then took the parts home to sand, primer and paint them. And after four years…Viola! They are finally done!

I am hoping the new clutch master cylinder repair kit and NOS clutch slave cylinder arrive this week from England. The next project in line for going up on my bench is the pedal box assembly. I would like to repair, finish, and install that before we get the motor back from Chris.
Thanks for visiting.
Toddy