About Me

New Hartford, Connecticut, United States
Name: Todd Russo Location: New Hartford, CT, USA

Wednesday, September 21, 2011

Getting wired up...Part 1

Since the harness was missing its grommets, Josh sent me three new ones. They arrived last Thursday. Thanks so much, Josh!!

Before doing anything, Scotchgard was sprayed on the harness fabric. John read this tip in British Marque News and told me about it. I thought I would give it a try. It will hopefully help to preserve the look and durability of the cloth wire covering…at least it will not harm it.

Then the new grommets were slid into their proper position. Not a fun job!!

The harness was pushed and pulled from the interior passenger compartment through to the engine bay…

…and the grommets were installed.

The rear harness was weaved from the trunk, over the wheel well and into the sill on the passenger side.

And it was connected to the front harness.

The rear lights and fuel pump were the first connections made. I know the wires have to go through the hole in the body wall, but I just hooked them up like this so that it would make it easier to snake the harness through to the body. I will fix it! Yeah, and I will clean the dust out of the trunk, too, while I am at it!

It is going to be a busy couple of work weeks coming up. I am now waiting for a clutch assembly from Minimania...they told me it is coming from England this week.  Once that arrives there will be more engine updates. I hope to get the rest of the harness laid out in the car and have a few components (voltage regulator, fuse box, selenoid, flasher unit, etc...) hooked up by this weekend.
Thanks for visiting.
Toddy

Tuesday, September 13, 2011

The wire harness looms over me.

It took four and a half months, but the brand new wire harness (loom) finally arrived! It is beautiful…and it smells good, too!
The first task was to inspect it and compare it to the original. I laid them out side by side on the cellar floor. The old one is in bad shape with many wires chopped up, and some were “repaired” at some time.

I only had three minor issues with the new one. The clip connector cover to the voltage stabilizer from the generator/dynamo had a different cover than the original.

Not a big deal at all. I just took the original one off, cleaned it and then replaced it onto the new clip. These connector covers are no longer being reproduced. They should be since they are used on almost all vintage British cars (that I know of anyway.)

Next, I found that the new lamp/bulbs connectors to the “idiot” lights and the speedometer were different than the original. The old bulbs and sockets, the screw-based #987 for the speedometer, and #281  for the small “idiots,” were replaced with new plastic sockets. I e-mailed Josh at British Wiring to see what the modern replacements were since the original bulbs did not fit. He told me that the larger bulbs are now #194 and the smaller are #34. We will go with those because I do not feel like chopping up a brand new harness (that was fairly expensive!) to put old sockets on it.

The last issue was that the two rubber grommets that cushion the harness in the firewall and interior body panel were missing. Josh informed me that there should have been grommets put on the new one so they either forgot at the factory, or that size is not made any more. It should still be available because 1100s were very common in Britain. I think they are a #508 grommet.

Once I get the grommets and bulbs (again, little parts are holding me up!), I can begin to install the harness. I cannot wait to put in the other electrical components such as the fuse box, and the solenoid, etc…

I am very pleased with the harness! Special thanks to Josh at British Wiring, who has been through the muck with me, and the folks in England, who made it…ever...so...slowly. The old harness was just nasty and unusable. So glad that I got the new one!
Thanks for visiting.
Toddy

Friday, September 9, 2011

Finally a two door sports sedan again!!

All summer long I have been searching for the proper screws to install the doors on Old Biddy. The original ones were rusted solid to the other car body and all twelve had to be drilled out in order to take the doors off. Locating Part # RMZ 512 (described as 5/16”-24 x ¾” oval head, Phillips or posi-drive, with pointed ends) was difficult. None of the major British parts suppliers carry that correct size anymore, but DMP fasteners came through for me. Check my last post for the picture.
Once they arrived, I did a quick test fit just to make sure they worked. I was a bit leary because they did not have the pointed end which acts as a “catch/guide” for threading the screw onto the floating adjustment plate in the body. But they seemed to work just fine.

I called my friend, John, over to help me install the doors. We first rested the door on a wooden crate and cushioned it with foam to help support it. No use injuring our backs. Then surrounded the opening with blue masking tape to protect the paint.

As expected, we had problems lining up the screws to the floating plates.
John went home and made a tool from a 5/16"-24 bolt. He ground the end to a point and put it on the end of an Allen wrench. It worked great!

The first door, the driver's side, went on nicely but it is a bit crooked. Shims will have to be made for the bottom hinge to align the fit properly. The second door, the passenger side, went on easier and it aligned better. I still have to tap out two holes so the screws can tighten the hinge to the body on that side. Yeay! Old Biddy, the two door sports sedan is finally sporting her two doors!

And look what the Brown truck delivered Wednesday!! FINALLY!

It will take about another hour to finish with the doors, and it is onto the wiring harness. I am looking forward to it! It will be me, an MG 1100 wiring schematic, two wiring harnesses to trace and compare, and a cold beverage...life will be good!
What a good week! When it rains it pours…literally. We have had nearly 15 inches of rain here in the past two weeks.
Thanks for visiting.
Toddy

Wednesday, September 7, 2011

Big things DO come in small packages! Door Panel repair Part 2.

Big doings this week, as I will try to explain.
First two very important small parts arrived, the door panel clips (25 total) arrived from Victoria British…

…and the door bolt screws arrived from DMP fasteners in Chatsworth, California. Yes I know they do not have the proper pointed ends, but they are new and not rusty and nobody will unscrew them to look! I hope not anyway.

Since I received the door panel clips, I went right to work putting the passenger side door panel together. Just like the first one, I fit the Masonite panel to the door (with the clips on first this time), so I could mark the holes for the window crank and the door handle. I drilled the holes and checked to see if they fit. They do!

Then I fit the vinyl to the panel. This one will need a little more attention than the first. The vinyl is more wrinkly and lumpy.

I had to trim this panel quite a bit as you can see by the red marker line.

After cutting the Masonite, the vinyl was fit on. This one gave me a bit more trouble than the first. Some of the staples in the red pad strip did not line up so I used my needle nose pliers and straightened them out.

Finally stapling it on with what seemed like ten million staples. Since the staples were a touch too long, I cut up a cardboard cereal box into thin strips to act as a spacer. It worked great and I should have done this on the other one, too, but it is too late now!

It all worked out well and after my whole summer went by, both panels are finally finished (minus the handles and door pockets, which will be installed after the doors are hung and these are attached to the doors.)

And now for some eye candy. I had to drop stuff off at Chris's last night. Here is the rebuilt transmission about 75% complete. My goodness it is sure pretty!

And remember the stinky, icky, oily sludge that was stuck in the bottom? Well, look at it now!

Next, now that the screws came, I will hang the doors on Old Biddy. I will have to call on my good friend John to help me as it is a two person job.
Thanks for visiting.
Toddy

Wednesday, August 31, 2011

So what is on my bench now?

After waiting all summer, and just in time for the first day of school…the next two big shipments of parts finally arrived! Well, half of my parts finally arrived anyway. Most of my stuff came from Moss Motors but I still am waiting for the box from Victoria British, which also contains the much anticipated and all important door panel clips.
I do give Moss credit for packing everything well in gigantic boxes. I guess that justifies the huge shipping charges for them. Here is the first box from the second order that came from Virginia.

And, the second box from the second order came three days later from California. Moss Motors is strange in the way that half of my parts were down in Virginia and the others were 3000 miles across the country. I am still waiting for the main bearings, which are on back order.

I actually got a request from someone (in the UK!) who wanted to see what was “on my bench” at the moment. They asked me what I have been working on while waiting for my “stuff” to get here. Here are some before pictures of parts and projects from earlier this summer that I have been cleaning up. A “before” picture of the door stay.

A “before” picture of the starter.

The box of engine parts where you can see the “before” starter and the “before” (blue rebuilt but not restored) generator and on the floor are the fan belt pulleys in primer.

And here is my bench today! The starter was inspected and repainted. The door stay has been cleaned in vinegar (the primordial ooze) and prepped for painting, and a great relief was that I found its original (and no longer available) clevis pin in a container of old bits and pieces!! The generator has been painted its proper black. Next I will mask the black parts off and spray the other pieces silver to match its original color configuration. And in the middle there somewhere are two original bumper bolts and nuts that I found hanging out in the same container with the clevis pin!

I am desperately looking for a set of door bolts. Al never gave me back my original ones. Original part number was RMZ 512, they are 5/16-24 x 3/4 with posi (or Phillips) oval head pointed end screws. I need all twelve in order to install both doors! Or does anyone know which other cars they fit? I know they are not from MG Midgets or MGBs.
Now I have to get the parts down to Chris so he can get going. Also, I have to contact my “secret parts source” for a couple more items. I will finish working on a couple of parts and there is always the waiting for that always promised but never appearing wire harness! And again, I do stress that it is NOT Josh’s fault. He has been great with me!

Thanks for visiting
Toddy

Saturday, August 20, 2011

The engine hospital visitation.

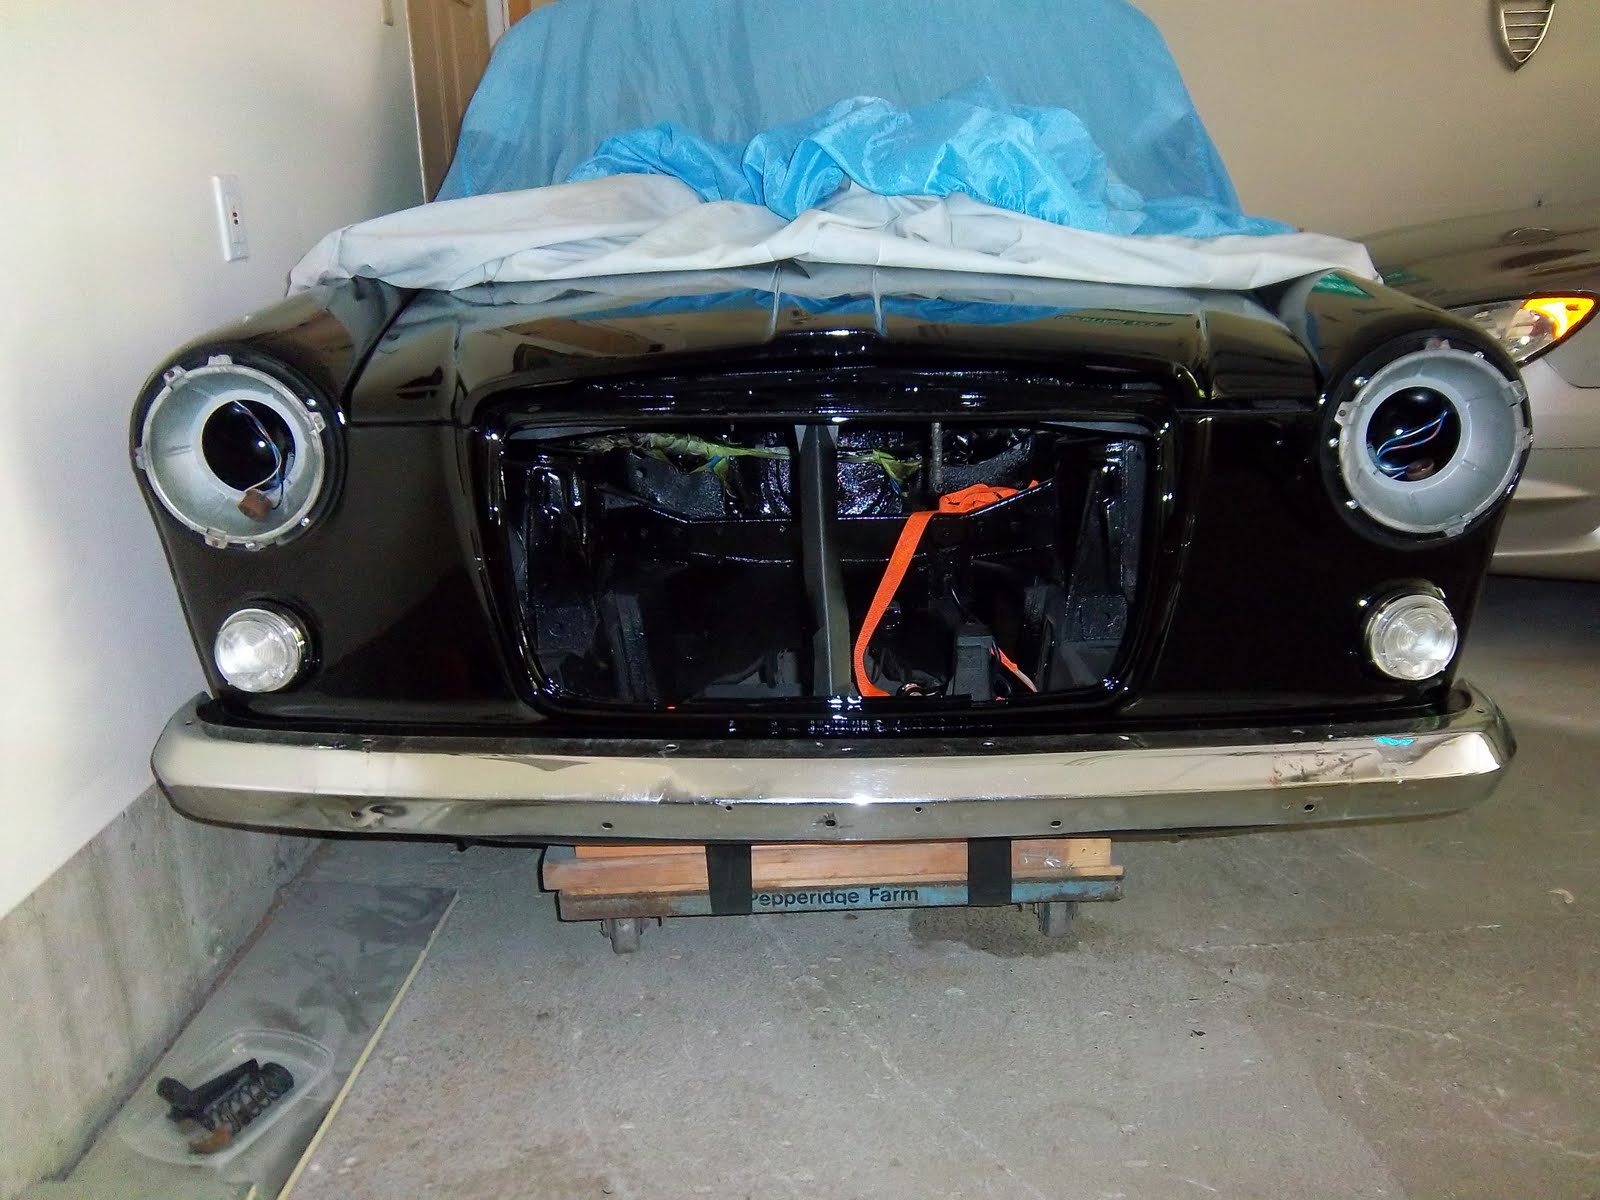
     Hard to believe it has been over two weeks since our last installment! So much has been going on but it is all "unbloggable" stuff such as; I e-mailed Josh at British Wiring and found out that I should have my wire harness by the end of this coming week. More parts painting and sorting, which many of you are bored of seeing so I did not post about it. One quick parts order to Moss Motors and a quick long weekend away with the family rounds out the absence.
     Last evening I got a chance to visit Chris in his secret tucked away barn lair to see the motor. I am happy to see that it was all in pieces and every part is getting inspected.
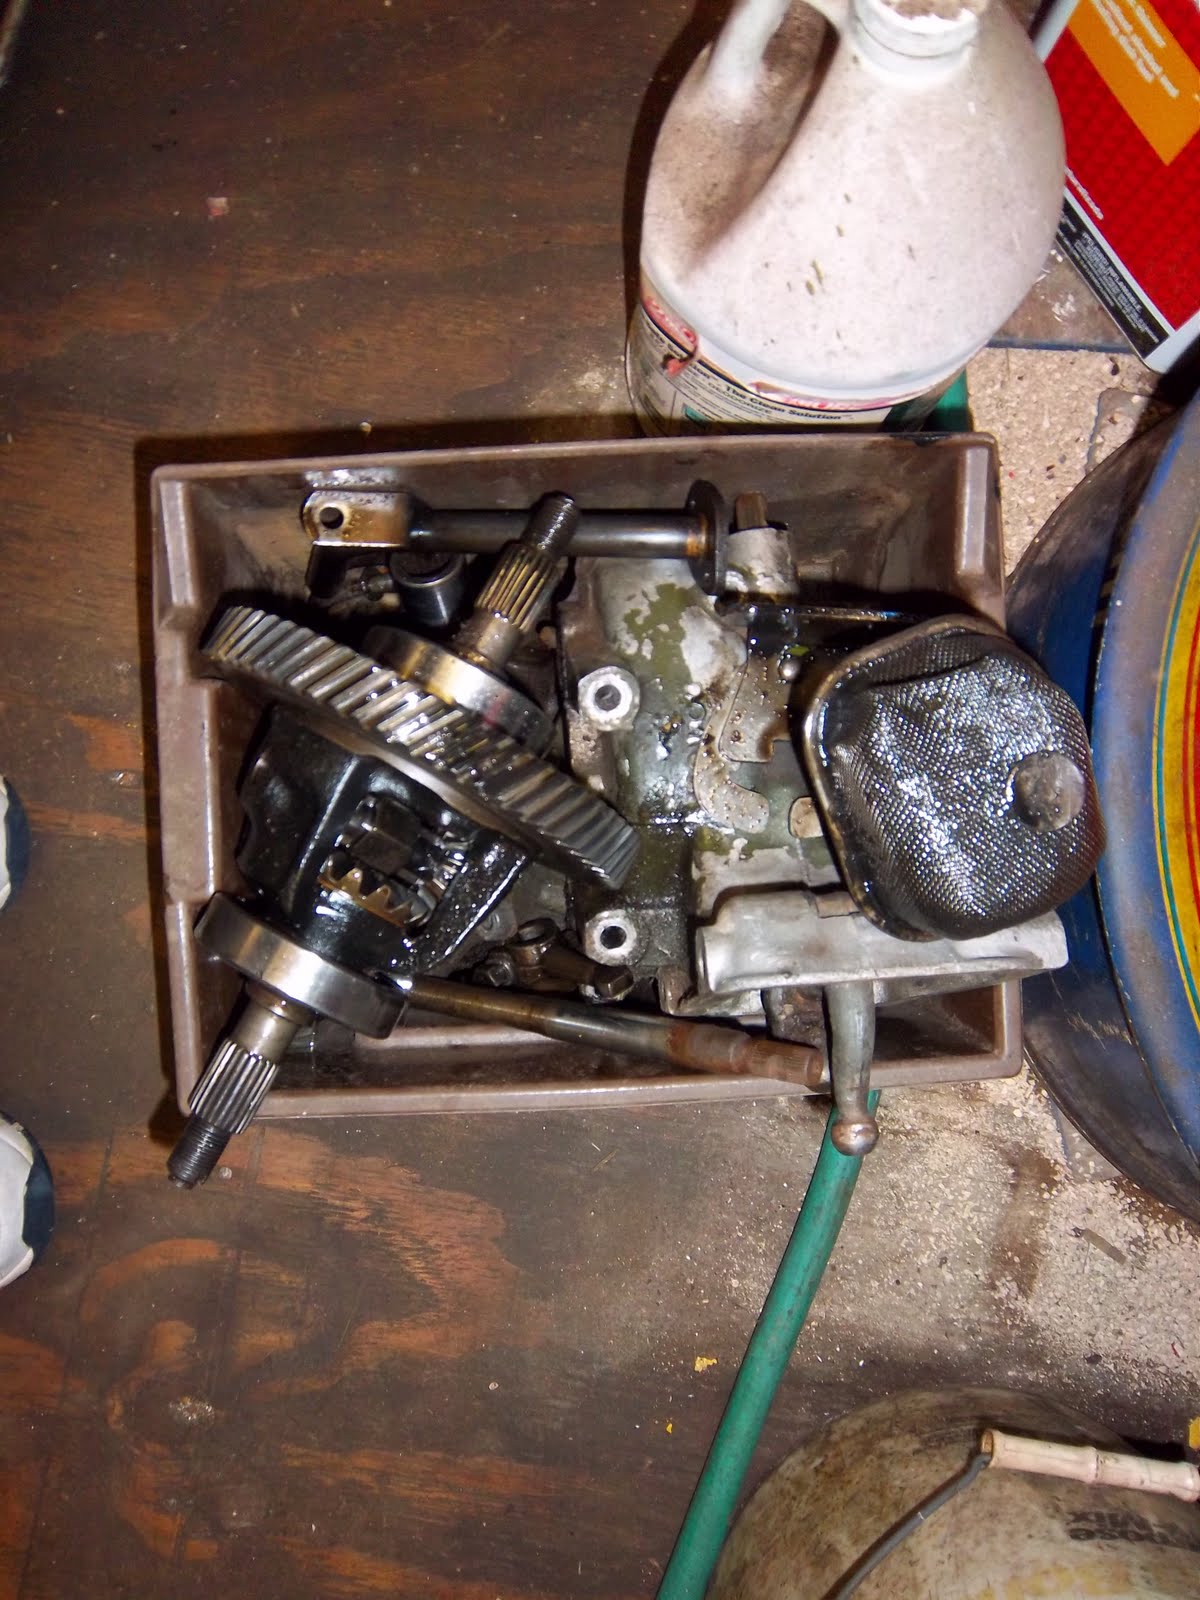
     First, here is the story of the transmission. As you can see there is a thick layer of gunky oil sludge in the bottom of the case. This illustrates the lack of maintenance and abuse this engine has had throughout its 50.929 total mileage life so far! The gunk actually smelled burnt, which was weird!

A couple of bearings exploded but did surprisingly little damage to the gears.

The layshaft has to be replaced as it has been scored in two places. Also, the gear syncho (below it in the picture) was totally worn out. If I remember correctly, I think it was for 1st gear, which is typical.


Chris likes to used a canned ham can to store the bits and pieces. I use a plastic Chinese food container myself. To each his own.

The good news is that everything is fixable or replaceable and it could have been much worse! Here is Chris's operating table in his inner sanctum, a place where very few people get to see!

The lower side of the block shows the crankshaft in good condition. The block and the head will be brought to a machine shop to be tested and inspected. Then we will know how much it will have to be bored out.

It was already bored 10 over once in its life. So it may be bored 20 over (from original) by the time all is said and done. No, I am not going to have it bored 40 over as all my friends suggest!

Chris laid out the exploded oil pump. "Here is your four piece oil pump", he said. He figured that the lack of oil pressure to the transmission was part of the reason the bearings blew. Well that, and that these BMC 1100 motors start practically dry with no oil in the system for the first five seconds or so until oil pressure builds up.

More big bits and pieces. When the head goes to the shop this week for inspection and compression testing, we will probably have new exhaust valves installed so Old Biddy can run on unleaded fuel.


And one last "guts shot".... The old diff pin will be changed out because there is "a bit of slop" in the gears. The new one, which already arrived in my first parts order delivery, should take care of that.

It was an interesting visit. I was expecting all bad news but Chris assured me that once the motor is rebuilt, life will be good again. Now I have another list of parts to order (more "unbloggable" stuff to do). I hope the wire harness gets here as promised this week then I can install it! At least I can see some real progress at last!

Thanks for visiting!

Toddy

Friday, August 5, 2011

Bumping into good and bad news.

This week I had a chance to call Chris, who is re-building Old Biddy's motor. On this rare conversation with him, he told me about his progress on the project. He started by saying that when he was draining the oil he noticed some roller bearings stuck to the magnetic drain plug. Should I continue with the story, or have you figured out what the conclusion is? Yes, I may need a new transmission! Chris's comment, "Well, I think I discovered the reason why they parked the car!" Got to admit that that made me chuckle.Yeah, that was great news....

So, since it will be a little longer before I get the motor back, I continued on the vein of puttering, as I have been doing the past three weeks. I wanted to clear more space down in my cellar workshop by putting bigger parts on the car which take up room downstairs. Since the front lights were installed last week, I went ahead and put the back ones on, too.

As with the front indicators, they went on pretty smoothly, also. The driver's side is an NOS light which now makes the original passenger's side one look pretty ugly.

Then I started to work on the front bumper. By far it is not perfect but it will hold a space for the new one that I will get some day down the road. It was rusty on the inside.

Here's some good news...I actually bought a tool!! Yes, I know that sounds strange coming from me but I splurged and purchased a wire brush wheel for my drill. It worked great for cleaning up the inside of the bumper.

It came out looking like this!! NO, not really. This is the next day after I had primed it and painted it with some "chrome" paint. It will do the job for now as I know it will only last a few years.

After I polished the chrome with Nevr-Dull, just for kicks I hung the bumper on the car. It gives the car some real character. All of my bumper bolts and hardware for both front and rear were beyond saving. When I make my big order for engine parts to Moss motors, I will put them on the list, too.

I found the bumper over riders in a box hidden inside another box. They will also hold a spot for the new ones...whenever I get them. The original ones for the MG 1100 literally crumbled to bits when I was disassembling the car. These were from an Austin America.

They do not quite fit. Their profile is quite different. I may have to put a rubber strip on them for now so they will secure tightly. Here is a close up of that crazed rusty gleam that some people call "the vintage look".

I still have not gotten the wire harness back from the UK! Josh at British Wiring contacted me and let me know to expect it around August 24th if everything goes as planned. I have to think positively and hope for the best. At least this week I had contact with Chris and I bought a new tool so life is not all bad!

Thanks for visiting!

Toddy