About Me

New Hartford, Connecticut, United States
Name: Todd Russo Location: New Hartford, CT, USA

Thursday, November 21, 2013

Sub-panel installation finished!!


Man, it seems this “little” dashboard project has taken forever!! Time to button it up and move on to other things. In order to do so, Old Biddy had to be started so I could check to see if the gauges were working. I found that she had a minor choke cable issue, which is why she wasn’t starting. But now she starts.

Once the dashboard (fascia) was secured in place, the parcel shelf was finally secured in place, also.
 

I started to work on the side panels to the sub-frame. The white paper template had to be carefully cut and refitted about ten times before it fit correctly. It was then transferred to Masonite and cut out. I hope to have them finished next week.
 

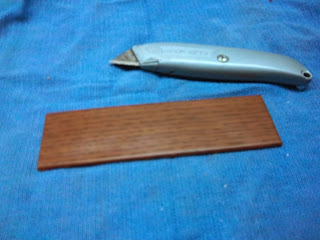
And, I finally got around to working on the blanking plate. It was scratched and had two holes drilled in it.
 

I put the same walnut-grained shelving paper as the dash on it to match.
 

I temporarily set it in place for now. It will have an Airguide altimeter stuck to it when finally installed.
 

Next, I will move on to working on the last two electrical issues that need to be figured out; getting the interior light and the horns working.
 

Thanks for visiting.

Toddy

Tuesday, November 12, 2013

Sub-panel installation Phase 3: Tachometer and finishing


This week I finally finished installing the instruments. The last one to connect was the tachometer.

This is a Smiths RVI 2401/00B. The “I” stands for Impulse, which means it is electrical and non-mechanical (no tachometer cable to the engine). The back side shows a loop of white wire, or impulse loop. One side of the wire is marked red, and the other side is marked black.
 

Since Old Biddy is a positive ground car, the red wire connects to the coil, and the black usually connects to the distributor (reverse that for a negative ground car). Notice I said “usually”. I wanted to connect it up as it would have been done if built in the factory, such as the way an MG Midget was hooked up. So I traced the white coil wire with my continuity meter from the coil to the fuse box and marked it with a red Sharpie.
 

Then I traced the wire from the ignition switch to the fuse box, and marked it black. This is the wire that would have been connected to the distributor. In essence, the white wires go through the tachometer instead of the fuse box, like a Midget and MGB. I connected the wires so I could cut them to length inside the car.
 

I set the tachometer in its place in the panel and hooked up the wires inside the car while disconnecting the other ends back at the fuse box. I went to turn the panel lights on to test the tachometer light and it did not go on. Good thing I did that while the white wires were not connected because I found that the tachometer was not grounded. I ended up connecting a black wire to ground.
 

Then, I flipped the switches again and all the panel lights went on!! Quite exciting! (Of course they are much brighter in real life.)
 

Next step is to connect the white wires at the fuse box to the tachometer and test it. But…cantankerous Old Biddy will not start. I have to wait for this weekend when the weather is supposed to get above 50’F before I can troubleshoot. Hopefully it is only a minor setback.

Thanks for visiting.

Toddy

Wednesday, November 6, 2013

Sub-panel installation Phase 2: Connecting the wires


Home life has been very busy this past week. Whenever I had a couple spare minutes, I managed to go out and set another wire or two.

I finally attached the sub-panel fascia to the dashboard. It  helped to organize the wires to where they are going. This also needed to get done before there were too many wires in the way.
 

Little by little, piece by piece, the wires were connected to their prospective instruments. First the voltmeter, then the oil pressure gauge. The vacuum gauge has been set in place but is not hooked up yet, as it is a mechanical not electrical gauge. All the tachometer wires are now hanging out of the hole. I still need a couple days before it will be all connected and working.
 

Behind the panel, it looks like a rats nest. These will all be organized after the tachometer is installed.
 

My best friend this week has been this wire cutter, stripper, crimper tool. Without it, I would be very frustrated!
 

I still have to connect three more instrument lamps (the light for the tachometer is done) to get them working, the ignition light in the tachometer needs to be connected, and the tachometer wires in the engine bay have to be connected. Since the tachometer is the most complicated (and expensive) instrument, this will be the main topic in the next post.

Thanks for visiting.

Toddy