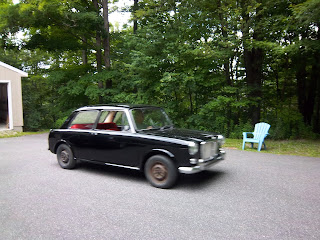
With the
weather not cooperating last week, I had to wait for the weekend to install the
driver’s side striker plate. I found out that the battery charger was hooked up
wrong so I took the battery out of the car and tried again.. The battery did fully
charge up after all. After it was put back in the car, Old Biddy was driven outside
where there was plenty of room to move around.
Since I kind
of knew what I was doing this time, this striker plate went on in only an hour, a third
of the time! And it works perfectly!
After
triple checking to make sure the door closed smoothly, stayed shut, and opened
with both the interior and exterior handles, I called my wife outside and said,
“I’m going for a ride!” “Are you sure?”, she replied. Then I said, “Here’s the
camera…I’m going. Document this!” I did a quick pre-flight test to make sure all the instruments were reading correctly and everything was sounding as it should.
Then I
released the handbrake, shifted into 1st gear, and released the clutch pedal as I
gently pressed the accelerator. With that, we began the slow taxi up our steep driveway.
I took off
up the hill to our nearest neighbor about 850 feet away with a top speed of
28mph and turned around in their driveway. I would have gone further but her
tires are cracked and very unsafe.
Then we
headed back down the hill towards home.
Everything
worked well! I was so excited I had to stop at the top of our driveway to give
my wife the thumbs up!!
Then we
slowly drove back down the driveway to park and have a post-flight inspection.
Notes: The
hydrolastic suspension is amazing! Our road is very bumpy. I am used to riding in my Midget
and Fiat 500 and feeling every bump in the road. It felt as if I was riding in a
boat, everything was smooth.
Shifting
is like it was my brother’s old VW Rabbit or stirring a pot of spaghetti. Eventually
you will connect with the gear, be patient!! I only used 1st, 2nd, and reverse.
The brakes
worked great, the drivetrain worked great, all the electrics worked great, the
suspension worked great. Next, the post-flight fiddling and finishing so she
can become an official vehicle again.
There is
still a punch list of things that need to be done before she can be taken through
the State of Connecticut Department of Motor Vehicle (CT DMV) inspection (or as the folks in Britain say "MOT"). Connecticut is the strictest
and most expensive in the US!! I hope to have her registered and insured before
she gets put to bed for winter. I ordered new tires and they should be arriving today, so that can be taken care of. The next big thing is to have her color-sanded
by Al, who did her bodywork and painting.
Thanks for visiting.
Toddy


